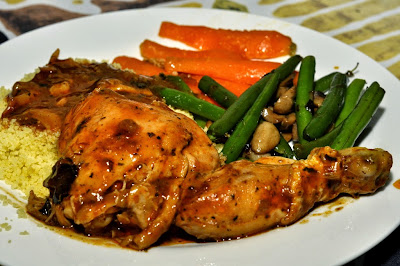
An old fart on a cooking journey

Tuesday, 2 June 2015

Savory Cheese and Onion microwaved mug muffins


 This was an experiment that sorta, kinda worked.
 I read a recipe on a food blog that I should have book-marked and wish I could remember. The writer made chocolate, lava-muffins, using a packaged muffin mixture and adapted the recipe to suit her vision. The end product looked absolutely delicious.
 It got me to thinking. I hate mucking about in the kitchen, weighing out and measuring and discovering, only after I've already been to the shops, the recipe calls for flour different from that which I have. Or, as is most often the case , finding, when I open the cupboard, some ingredient I was positive I have, is in fact, finished.
 I am more about eating than cooking. Certainly there are times when it's fun to cook up but most of the time, all I want is something tasty, quick and easy.

Neither time nor inclination

 Lately I've spent the bulk of my time working on my street photography website, www.jozifolk.com that has taken off like a moon rocket. As a result, there was neither time nor inclination to spend lengthy periods in the kitchen. But, at the same time, I grew tired of slapped-together, peanut butter sandwiches.
 So, muffins, pre-mixed in a packet, sounded wonderful. According to the manufacturer's instructions, all I needed to add was two thirds of a cup of cooking oil, two eggs and one and a half cups of water and, 20 minutes later, I'd have a dozen fresh muffins.
 But what if I cooked them in the microwave?
 I bought a packet of muffin mix for a paltry R10 (somewhere around $0.80!) and, armed with righteous thoughts, sallied forth to the kitchen where, I discovered, there was no vegetable oil.
 So, instead of vegetable oil, I used 1 3/4 cups of milk. I figured I may as well go all out and roughly chopped up an onion into the mix.
 The article about microwaved, chocolate, lava, mug muffins emphasised an EXTRA EGG ALWAYS BE ADDED to the number of eggs listed on the packet. I did this.
 When the mixture was ready I spooned it into a a mug until three quarters filled and sprinkled grated cheese on top.
 This was then nuked in the microwave for two minutes and tested if cooked by stabbing it with a thin-bladed knife that, when removed, was clean.
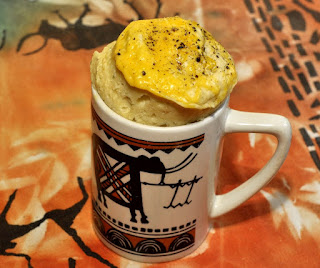
 As cooking proceeds, the muffin rises! The mixture towered over the rim of the mug. It is better to only half-fill the mug.

No prizes

The oven-baked version
 From an aesthetic point of view, these microwaved, mug, muffins will never win any prizes. Their texture is denser than expected but they are good, very good! They are incredibly filling and satisfying.
 I kept the remaining mixture in the fridge and later baked nine muffins in a 180c (350F) preheated oven, again with grated cheese sprinkled on top.
 If the truth be told, the oven-baked muffins looked better and had a better texture but the taste was the same.
 I wouldn't trot out the microwaved, mug versions if the arch bishop called to say he was in the neighbourhood and planned to pop 'round for tea but, as a quick, tasty, filling snack, when you're busy and tired of peanut butter sarmies...

My recipe:

Ingredients

1 packet of savory muffin mix
1 3/4 cups of milk
3 eggs (the packet called for two)
Ground pepper to taste
1 roughly chopped onion

Method:

Beat the eggs and milk together.
When well-combined, pour into a bowl containing the muffin mix, onions and pepper. (Add cooked bacon bits, ham, mushroom or other stuff you think will be tasty)
Mix together until combined but do not over mix.


Spoon into a microwave-proof mug until the mug is half-filled.


Cook on full power for two minutes (you may have to adjust cooking times according to your microwave. Test by stabbing the cooked muffin with a knife, or toothpick etc. When cooked, nothing should stick to the stabbing instrument.)
Monday, 25 May 2015

Magic Tart - so simple even a chimpanzee could make it


 This is the easiest tart/dessert you'll ever make. No kidding, no exaggeration, no bullsh*t! I guess that's the reason its is simply titled: "Magic Recipe".
 I kid you not, any oke, even a chimpanzee, could make it - and get it right first time. Which is probably why it'll become my go-to tart/dessert recipe. It tastes like a coconut milk tart - if there is such a thing.
 I got this recipe from my mother-in-law but am not sure of its origins. It is apparently is a hit in the rural church circles she is involved with and I can see why.

Ingredients:

4 eggs
1/4 cup of margarine
1 cup of white flour
1/4 teaspoon of salt
1/2 teaspoon of baking powder
2 cups of milk
1 cup of coconut
1 teaspoon of vanilla essence.

Method:

Whack all the stuff in a blender and blend until thoroughly mixed.


Pour the resulting gunge into a buttered 10 inch (25cm) pie dish.


Shove it into an oven preheated to 350F (180C) for an hour.


Remove, cut and serve. It is delicious hot or cold.

There was some mixture left over which I cooked for two minutes in the microwave in a mug. It tasted just fine but the texture wasn't quite right. Nontheless, the microwave version would work well for those "I'm still hungry, isn't there anything sweet?" after dinner requests.

Monday, 18 May 2015

The Old Crone's unbelievably delicious Chocolate Mousse


I really shouldn't call her "The Old Crone" as she is anything but. It started as a joke between us and kinda just stuck.
 Joy, my wife, a.k.a. "The Old Crone" is a fantastic cook so, when she said she planned to make a good, old-fashioned chocolate mousse, I prevailed up on her to write a guest post for Hungry Oke.
 I was there every step of the way, taking pictures, tasting, offering advice and generally getting in the way.


How to make a good, old fashioned chocolate mousse 

by Joy Hamann


 “Chocolate mousse,” I told my colleagues when they asked what desert I planned for a dinner party for friends.
 “That one in a box where just add milk?” one asked?
 I was mortified! There is nothing I hate more than the obvious taste of a “boxed” dessert – especially chocolate.
 My fail-safe recipe comes from an old English recipe book I bought years ago. Ingredients are few and easy to come by and it’s quick to make, rich, creamy and with a hint of rum flavour. It can be served in individual dishes or in a large bowl with cream piped around the edges.


You will need:

175g plain chocolate broken into pieces (if you want a richer taste, go with dark chocolate).
30ml strong black coffee
4 eggs, separated. (I couldn’t find my egg separator so I did what I’ve seen the Master Chefs on TV do – used the palm of my hand to hold the yoke while the white ran between my fingers into a bowl).
1 x 15ml spoon rum (I didn’t have rum, but used sherry. Because it doesn’t have as strong a taste as rum, you will need to use more, but be careful not to use too much because it will make your mousse watery.)

To finish you will need:

150ml fresh double cream
1 x 15 ml spoon grated chocolate

Method:

Put the chocolate pieces and coffee in a heatproof bowl over a pan of hot water and heat gently until the chocolate melts, stirring occasionally. Remove from the heat and leave to cool for a couple of minutes.


Beat the egg yolks and gradually stir into the chocolate mix. Stir in the rum. 

 
Beat the egg whites until stiff, in a clean mixing bowl with an electric or rotary beater or go old-school and use a hand-whisk. When separating the eggs, be careful not to get any yoke into the white. If you do, you'll beat until you are blue in the face and the whites will still not get stiff. 


Once the egg whites are stiff, fold carefully into the chocolate mixture until thoroughly combined. Folding (and not mixing) is important to get a light and fluffy effect.


Spoon into four individual glasses (I used flat champagne glasses) and chill in the fridge for several hours, preferably overnight. Before serving, whip the cream until thick, then pipe a rosette of cream on each mouse and sprinkle with grated chocolate. I used a mixture of white chocolate and biscuit wafer (PS Bar) and the remaining plain chocolate.

Since I don’t have a cream piper, I spooned the whipped cream into a plastic bag, and pushed the air out of the bag, cut a corner to form a piper. It didn’t work as well as expected, so I will soon be investing in a decent cream piper. But the end result was good and my guests certainly enjoyed their fresh, home-made chocolate mousse dessert.

Wednesday, 13 May 2015

Pollo Italienne - my go-to chicken dish

Easy chicken recipe

Pollo Italienne

(serves 4)

 This has become my "go to" chicken recipe. It's about the easiest chicken dish you can cook and is always a crowd-pleaser. It will also work brilliantly as a potjie*.
 It's an "okes" dish where, after the initial prep, you can let it cook without worrying or faffing and have a few toots at the same time.
 This recipe originates with Australian Masterchef judge and writer, Matt Preston, who calls it "Chicken Italienne". I call it "Pollo Italienne", mostly because I figure it sounds more exotic and impressive.
 I've tweaked it slightly, in as much as, I cook it in a flat-bottomed, cast-iron, pot on the (gas) stove-top rather than in the oven, as per Matt's recipe.

Ingredients:

1.5 kg chicken pieces. Thighs and drumsticks work best
2 large onions
2 teaspoons of garlic paste
1 tablespoon of dried parsley. Use fresh if you prefer
1 can of tomato soup
Currie powder, salt, pepper and spices to taste.

Method:

Brown chicken pieces and onions in a pan. (In my case the cast-iron pot)

easy chicken recipe

Add spices and seasoning.
When the chicken is browned and the onions caramelized, add the tin of tomato soup.

Easy chicken recipe

Add 1/2 to 1 cup of sherry or wine, if you want.
Bake in an oven preheated to 180C for approximately 75 minutes. If cooking on the stove-top in a cast-iron pot, place the lid on the pot and simmer on a low heat for approximately 75 minutes.

easy chicken recipe


Serve on a bed of pasta of your choice.

Notes:

In this particular case, I served the chicken with couscous, rather than pasta as I knew one of the guests does not enjoy pasta.

 *For non-South African readers, a potjie is a process of cooking a one-pot dish over a fire. Cooking is done in a pot-bellied, three-legged, cast-iron pot. It is steeped in tradition and, for many, almost a religious experience.

Monday, 11 May 2015

Gnocchi with chicken and vodka sauce

My gnocchi instructor and daughter-in-law, Chinal Zakrajsek

 I trust all you Moms were spoiled rotten on Mothers' Day yesterday, and you okes went to some trouble.
 I went all out.
 But, if the truth be told, I had no choice, two weeks ago, the Old Crone declared she would be doing no cooking on Mothers Day and, if we okes wanted to eat, we'd need to pull out our fingers and get off our butts.
 Fortunately, I am blessed with a daughter-in-law of Italian heritage who is a fabulous cook and baker and she came to my rescue.
 "I'll teach you to make gnocchi with chicken and vodka sauce," Chinal said.
 "Err...okay..."
She sensed my hesitation. Until yesterday, I'd neither seen nor tasted gnocchi.
 "Gnocchi is very easy to make, but difficult to get perfect," Chinal said.
 An hour or so later, the kitchen looked as though it had been hit by a flour-blomb but the gnocchi and sauce was done and it was delicious. I did my best to shamelessly take the credit but neither the Old Crone nor my 81 year-old mother was buying that.
 Afterwards, the Old Crone tried but failed to make me feel better when she declared: "You did a very good job cleaning up!"
 Pffft!!

Chinal's Gnocchi with Chicken and Vodka sauce

Ingredients:

(serves 3-5)  
                     
350 grams of flour
1 Kg sweet potato (we used regular potatoes as not everyone likes sweet potatoes)
1 egg
1 tsp salt
40g grated Parmesan cheese

Gnocchi is very easy to make, but difficult to get perfect. It takes practice.  This is a simple recipe for practice.  I use sweet potatoes because of the flavor, but regular potatoes are even easier to work with.

1.   Boil potatoes with skin on. (The skins help keep the water out. You don’t want your potatoes to be saturated. )


2.   Once boiled, dab with cloth to absorb any water. Peel and mash the potatoes. They should be soft enough to use a fork for mashing.


3.   On a clean counter-top, well dusted with flour flatten, the mound of potatoes into a 1-2 inch thick layer. Spread the flour on top for a second layer; sprinkle the salt and parmesan cheese on top of flour. 


4.   Scoop out the center, creating a little hole in the center. Drop the egg into the "well".


5.   Scramble the egg in the center, once it is whisked, use your hand to combine the ingredients. You may need to add flour to get a dough-like consistency, but do not add too much. (Too much flour will make the gnocchi hard and dense.)


6.   Knead the dough to form a loaf (Don’t over-knead. It will make them chewy)
7.   Once you have a loaf, slice lengths. Roll the lengths in flour and roll them out.

8.   Slice the rolls to make 2 - 4 cm (1 -2 inch) pieces. Size is up to you.
9.   Shake off excess flour and drop the pieces into salted boiling water.
10.  Once they all have floated to the top, they are done and ready to strain
11.  Let them cool down before serving. You can reheat, but letting them cool down will allow them to firm up. (If using regular potatoes you don’t really need to let them cool.)
12.  In a separate pan fry finely-diced chicken breasts.

Vodka Sauce

(serves 2-4)

I love Vodka Sauce. This one is a little different from the traditional style. I find this sauce is very good for Gnocchi. The flavor works really well with sweet potato too.

Ingredients:

1 Can tomato puree (Use diced tomatoes for a chunky sauce)
½ of 1 onion (diced)
½ cup Vodka (or in our case, Soju)
2 cloves garlic
2 tsp basil
1 tsp thyme
2 tsp sugar
½ cup cream
¼ cup of butter

1.   Pour tomato puree into small pot
2.   Fry onion and garlic in butter in pan until golden brown and add to tomato puree.


3.   Add the vodka to pot with tomato puree.


5.   Add cream
6.   Add basil, thyme and sugar. Cook for 30 minutes on low heat, stirring once in a while. (Add black pepper to taste at the end if you like a little kick)
7.   Cover your reheated gnocchi with the diced chicken and pour the sauce over it.

(Warning:  First time Gnocchi eaters; you won’t be able to eat as much as you think you can eat. Give yourself a smaller portion, trust me, they are filling.)

Please be cool and share!

Friday, 8 May 2015

How to eat a cheese sandwich

cheese sandwich, easy recipes

 And you thought that thing your Mum compressed into your school lunchbox was just a plain, simple, cheese sarmie. Seems not.
 The cheese sandwich has been, identified (according to the Guardian) as Britain's favourite weekday, lunchtime, nibble. It is not just a sandwich, but one of the building blocks of that country's identity - or so The Guardian says.
 This staggering news saw the publication of an in-depth article in...yep, you guessed it, The Guardian...on "How to eat a cheese sandwich." It's long and filled with facts and technique and if you are to attain your full cheese-sandwich-chomping potential, I seriously recommend you put aside a few minutes and check out the full article.
 However, for those who want the 30-second soundbite version, allow me to summarize.

  •  Choose a hard, waxy tangy cheese along the lines of mature cheddar, lincolnshire poacher or red leicester.
  •  Slicing is preferable to grating.
  •  Choose a good quality, impeccably-fresh bread.
  •  Eat the sandwich at room temperature.
  •  Real butter, not margarine or spread.
  •  Cut horizontally through the middle of the bread. Never diagonally. Eat the less enjoyable “square edged” bottom half first, as it has the larger, drier crust area, and then sit back and savour that relatively luxurious, rounded top-half.
  •  Drink with it, a huge mug of brick-red tea, or a zippy, lightly bitter golden or pale ale.

Now you know.

Wednesday, 6 May 2015

Microwave chocolate cake in a beer mug

microwave chocolate mug cake

 We sorted dinner for Mother's Day with the incredibly simple, quick, easy and delicious Marco Pierre White spaghetti carbonara recipe but obviously your mother, your childrens' mother or the woman you want to be the mother of your children needs something sweet to complete the meal.
 So let's knock up something easily quick and delicious. The inspiration for this comes from Table for Two Blog although I made a few small changes, mainly to accommodate mistakes I made and substitutions for ingredients I did not have.

 First off, it's important to note that all microwaves are different, so the cooking times are guidelines rather than set in stone. Tweak and test for yourself.
 My first attempt saw a mistake that turned into a happy result. I forgot to add the baking powder and ended up with a pudding rather than a cake. I added fresh cream and it was delicious.

microwave chocolate mug cake
The beer mug "pudding"
 The next attempt got everything right. This is a good one.

Ingredients:

1/4 cup all purpose flour
2 tablespoons unsweetened cocoa powder
2 tablespoons granulated sugar (add one more if you prefer it sweeter)
1/4 teaspoon baking powder
1/8 teaspoon salt
1/4 cup + 1 tablespoon milk
2 tablespoons of vegetable oil
1 tablespoon of peanut butter or Nutella or similar

Method:

1.   In a medium bowl, whisk together the dry ingredients.

microwave chocolate mug cake

 2.   Add the milk and vegetable oil and whisk until all ingredients are combined and the batter is smooth and silky with no lumps.

microwave chocolate mug cake

 3.   Pour the batter into a microwave-proof mug that is large enough to allow the cake to rise.

microwave chocolate mug cake

4.   Drop a tablespoon of peanut butter into the middle of the batter.

microwave chocolate mug cake

5.   Place in microwave and cook on high for two minutes. (This is a guideline. Test with a tooth-pick and adjust according to your microwave.) The cake will continue to cook for a while when it is out of the microwave.

microwave chocolate mug cake

6.   Allow to cool and garnish with chocolate shavings etc.

Please be cool and share!